1" ID NON-COLLAPSIBLE SUPPLY/SUCTION HOSE FOR PUMPS PER FOOT
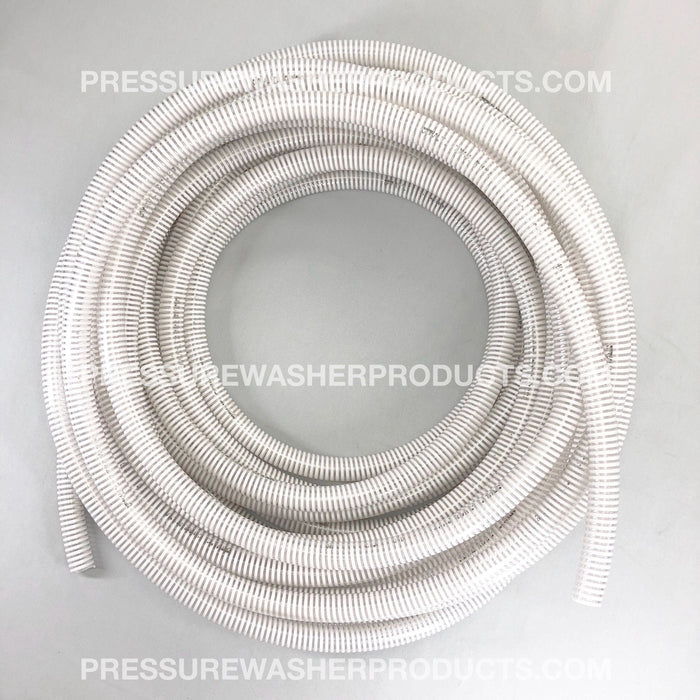
1" ID non-collapsible and PVC reinforced supply / suction hose for low- and high-pressure pumps sold per continuous foot (12")).
1.29 OD inches
90 PSI Recommended Working Pressure at 72 Degrees F
42 PSI Recommended Working Pressure at 42 Degrees F
3" Recommended Bend Radius at 72 Degrees F
300 PSI Burst PSI at 72 Degrees F
We do not crimp ends on this hose.
Hose is available in 100' continuous run or longer by special order.
Inlet line size should be adequate to avoid starving the pump.
- Line size must be a minimum of one size larger than the pump inlet fitting.
- Avoid tees, 90-degree elbows or valves in the inlet line of the pump to reduce the risk of flow restriction and cavitation.
- The line must be a flexible hose, not a rigid pipe, and reinforced on suction systems to avoid collapsing.
- The simpler the inlet plumbing the less the potential for problems. keep the length to a minimum, the number of elbows and joints to a minimum (ideally no elbows) and the inlet accessories to a minimum.
- Use pipe sealant to assure air-tight, positive sealing pipe joints.
All-Flo states that the suction hose should be up to 3 x the inner diameter compared to the inlet port of the pump.
Hose will be slightly generously cut and sent in one continuous length unless you send a note indicating otherwise.
This hose is great for high pressure pumps with a 1/2" inlet, 1/2" air diaphragm pumps, 12-volt pumps with a 1/2" suction or supply port and can be used with corrosive chemicals such as sodium hypochlorite and sodium hydroxide.
We carry this hose in 3/4", 1", 1.25", 1.5 and 2". We also offer this hose in a wire reinforced hose in the same hose ids.
***Supply/suction hose inner diameter (id) should be doubled compared to the pump inlet/suction port. for example, the general pump TS2021 (HP5535) has a 1/2" inlet on either side of the bottom manifold of the pump. The pump should be supplied with 1" non-collapsible suction hose.
Mount the pressure washer as low to the surface as possible in relation to the supply port/bulkhead of the water tank but remember to use shock absorbing rubber pucks (Part# 4542) on your skid L-brackets (1213) of the pressure washer. Most pressure washers can be converted from cart with wheels to skid units by removing the wheels and installing L-brackets for your unit available through us.
Minimize the use of extra fittings. Do not use galvanized fittings or metal ball valves between your pump and water tank because they will likely corrode and flake little chunks into your pump valves leading to vibration and/or damage. Avoid extra elbows. Do not use PVC pipe anywhere. PVC pipe can become brittle and doesn't tolerate the weight of a surface cleaner, ladder, or your body weight for long. If not installed correctly, air will find its way into your pump leading to manifold damage. Install components using non-drying liquid Teflon and never use Teflon tape.
Never adjust your unloader. The unloader should be set using a whip hose, high pressure ball valve, high pressure steel tee, snubber, and gauge to 200 psi above the operating pressure of the pump and left alone. Do not install check valves or any type of swivel fitting on the suction/supply hose assembly or air may become entrained causing extensive damage from cavitation.
Working with non-collapsible hose can be challenging. We have several heat guns and ratcheting PVC hose cutters to tame the hose. When installing the hose into hose barbs, first slide the hose clamp a few feet away from the cut end. Grab some Slo-Mo Softwash surfactant for sodium hypochlorite, dish soap or shampoo and coat your finger or old toothbrush with a generous amount. Apply the soap to the inside several inches and to the barb end of the hose barb.
Turn on the heat gun and hold the heat source about 3 - 4" away from the hose end while rotating the hose as you try to apply the heat as evenly as possible. Heat only until the hose turns shiny and releases a single plume of smoke. Turn off the heat gun and set it aside to cool. Install the barb into the hose end and push it down against the ground or vertical surface. allow the end to cool naturally, move the hose clamp up about 1/16" or 1/8" from the end toward the thread and tighten securely. Install the hose clamp to allow you to access it easily in the future so that you do not have to struggle to use a tool on the clamp.
The unloader bypass hose that sends water back to the tank when you release the trigger on your gun should be installed using 3/8" or 1/2" kink resistant hose. The port should be installed so that the stream of water shooting into the tank does not point directly at the pressure washer suction/supply bulkhead. You don't want to create air bubbles in your supply water. The bypass hose running back to your tank will act as a back-up for your thermal relief valve mounted on the opposite side of your pump to the suction hose assembly.
Do not use Teflon tape on any fittings. Use medium, removable thread lock (5003, 10 ml or 5004 50ml). Try not to use elbows or extra fittings. When at all possible, minimize the use of quick connects. Install the chemical injector at least 3' away from the unloader to prevent back-siphoning of chemical into the internal components of the unloader. Always remove the chemical injector assembly when not in use.
Use a R2 or 2 wire jump hose on the high-pressure outlet of your unloader to your reel.
Questions: sales@pressurewasherproducts.com or call (727) 562-5488
Condition: New
SKU: AGC16