8-12 GPM POWER WASHER PLUMBING KIT IBC TOTE SQUARE TANK PL-8-TO
8-12 GPM pressure washer plumbing kit for an IBC or square caged tank with everything needed to correctly plumb the supply side of the pump. You receive everything you will need from the tank connections, the unloader bypass return, the 1/2" high-pressure jump hose to your hose reel, and a 50' 1/2" ID high-pressure hose for your hose reel to improve efficiency.
This kit fits pumps with 3/4" female inlets. Please check the unloader bypass hose ID. Please include a note if you have any other than a 3/8" ID If no note is included, a 3/8” bypass hose and barb will be sent.
It is a great deal. This kit comes with all the parts and hoses you need to source from many places. You need to buy the liquid Teflon, hole saws, and heat gun from the hardware store before this kit arrives. This kit will eliminate many trips to the hardware store. If you complicate your plumbing by using hard pipe (against all the pump manufacturer's recommendations, you set yourself up for pre-mature failure and maintenance). Do not use hard pipes. The pipe increases turbidity and becomes brittle over time. We suggest using 80 PVC barbs because they last. Polypropylene barbs are soft and are often reinforced with fiberglass. The UV rays break down fiberglass over time. Buy it once and depend on your equipment.
If you plumb your pressure washer using this kit, you will spray farther using your gun/wand, move faster surface cleaning, place less stress on the unloader, pump, and engine, lower the pump operating temperature, go through fewer O-rings, and quickly connects, drain your tank faster and get home to your family faster than using the 1" barb and 3/8" hose. We stopped having pump/unloader problems when our customers switched out to the upsized plumbing. Every user who has switched to the larger hoses will never go back to the smaller hoses. Completing the work faster is always better and less wear on your equipment means more money in your pocket.
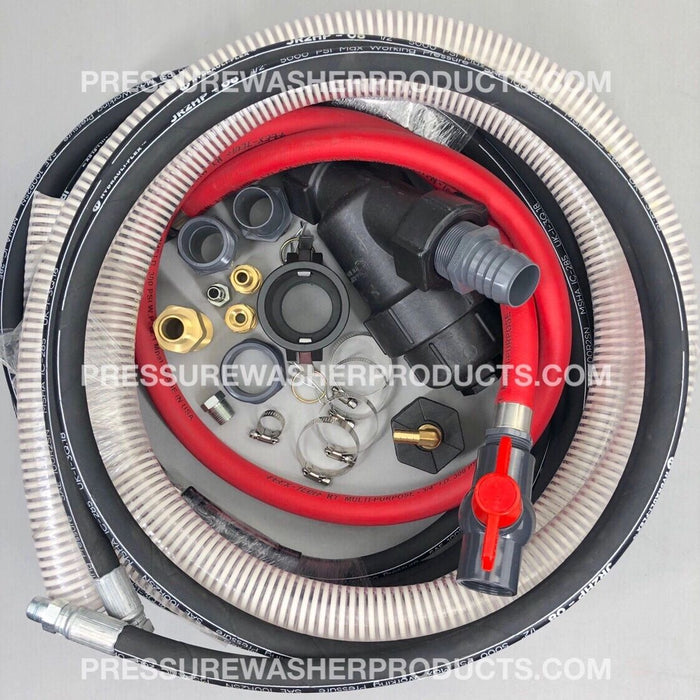
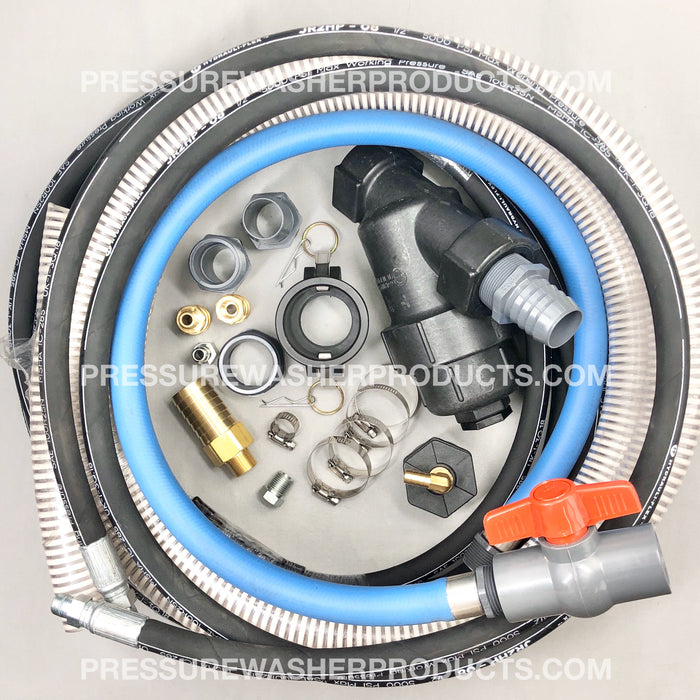
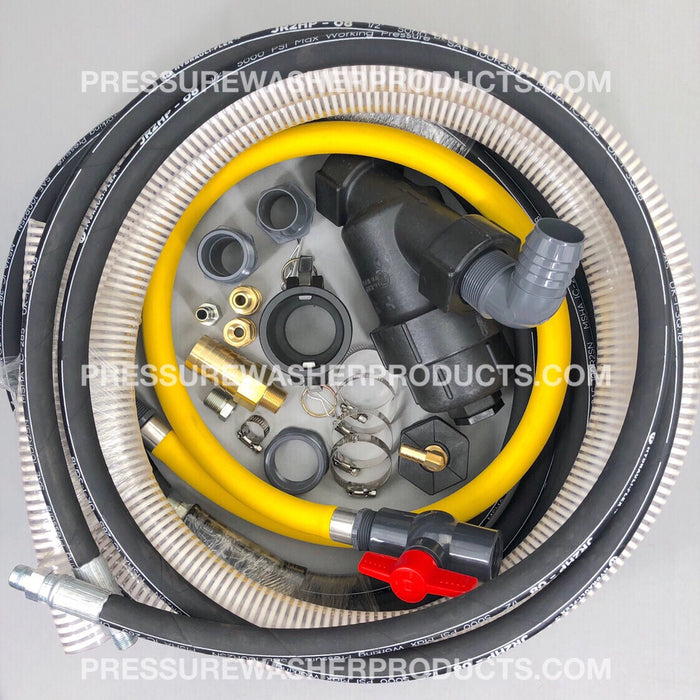
Included in the kit are as follows:
1 x 1 1/2" heavy duty high flow 80 mesh y-strainer
3 x SCH 80 grey hose barbs (a 90-degree barb will be sent with this order)
1 x large brass hose barb for the pump inlet
1 x tote outlet connection
1 x connection for the outlet of the tote
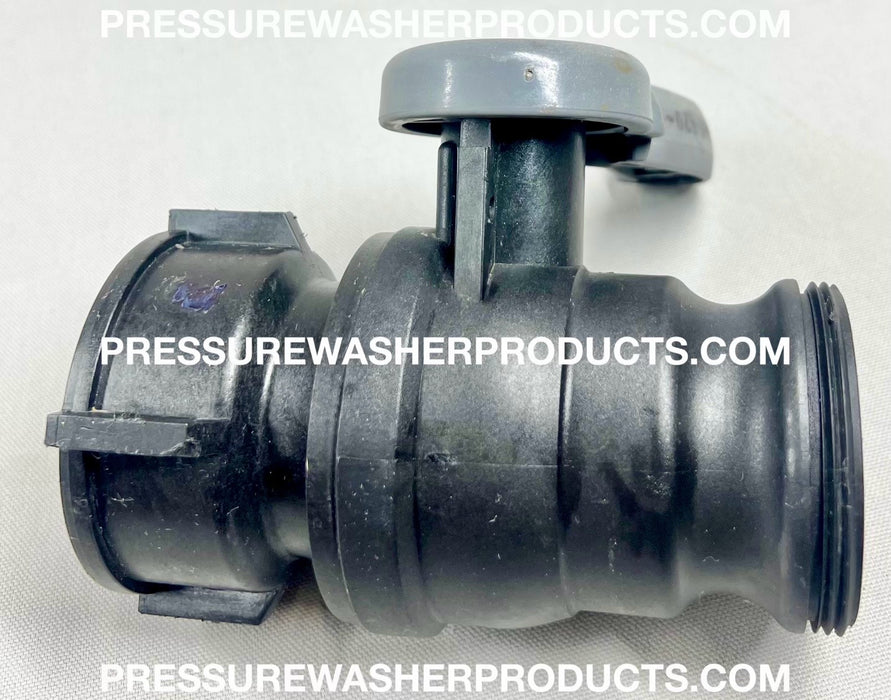
(Look for the lip or slight depression on the large ball valve on the outlet of the tote as pictured in the last photo showing the grey handled valve. The last photo is for reference only and will not be included with the kit. If you do not see a lip or smooth depression, please order the Pl-8-TA or request the 2” Coupler in the notes at check out for the lip or slight depression on the large ball valve on the outlet of the tote as noted in the photo. If you do not see a lip or smooth depression, please order the PL-8-TA or request the coupler in the notes at checkout. If you request the coupler, you will not need to request the other kit (PL-8-TA) and will be able to adapt the tote outlet. Do not use a rubber coupler as the coupler will allow air into your pump manifold.)
Very important that your tote has a lip on the outlet.
1 x 3' hand wash hose and ball valve for y-strainer cleanout. The 3/4" hose is crimped on both ends and includes the ball valve for clean-out.
1 x 3/8" female socket to connect the jump hose.
1 x female plug to connect the jump hose.
1 x male coupler to connect the jump hose at the reel.
10' 1 1/2" ID non-collapsible supply/suction hose.
1 x 1/2" FPT bulkhead and 1 x brass barb elbow for your bypass return line from the unloader: please indicate barb size. Do you need a 3/8" or 1/2" barb? Please leave a note indicating your choice of 3/8" or 1/2" bypass barb at checkout. (Hot pressure washers often use 1/2" bypass hose) if you need assistance, let us know. If no note is included at checkout, we will send you a 3/8” barb for the hose on your unit.
1 x 50' 1/2" ID high-pressure hose. This hose is supplied with one end that is 1/2" MPT and one end that is 3/8"MPT
1 x high-pressure 1/2" ID jump hose to connect your pressure washer to your hose reel up to 12' long. Hose can be ordered with ends crimped on in 3/8" x 3/8" or 3/8" x 1/2" and 1/2" x 1/2". Please indicate the length you need, and hose ends at checkout. If the note is not included, an 8-10' hose with 3/8” MPT ends will be sent.
5 x stainless steel hose clamps.
1 x 1/2" MPT x 3/8" FPT steel reducing bushing for the hose reel inlet at the swivel
The 50' special high-pressure hose is convenient because it allows you to use either a coupler and plug (2401 and 3878) to connect or for an even better connection without an o-ring to worry about, use a high-pressure 3/8" steel coupler or part number 2582. You need to add those parts to the cart. They are not part of the kit.
Most guys use a chemical injector before the reel and require a 3/8” MPT end but may want to directly connect to the outlet of the unloader. We can crimp both 3/8” & 1/2” MPT and FPT. A custom crimped hose ties your rig together.
If using a hose reel, consider the hose reel connections. Most hose reels use 1/2" FPT inlet/outlet connections. This kit is set up for a reel with 1/2" FPT fittings.
At checkout, please list answers to these questions:
- Do you have a 3/8" or 1/2" bypass hose and barb on the unloader (hot pressure washers often use a 1/2"bypass hose; you would request the 1/2" barb elbow for your existing hose.)
- Jump hose length up to 12' and 1/2" x 3/8", 3/8" x 3/8” (Most common) or 1/2" x 1/2"
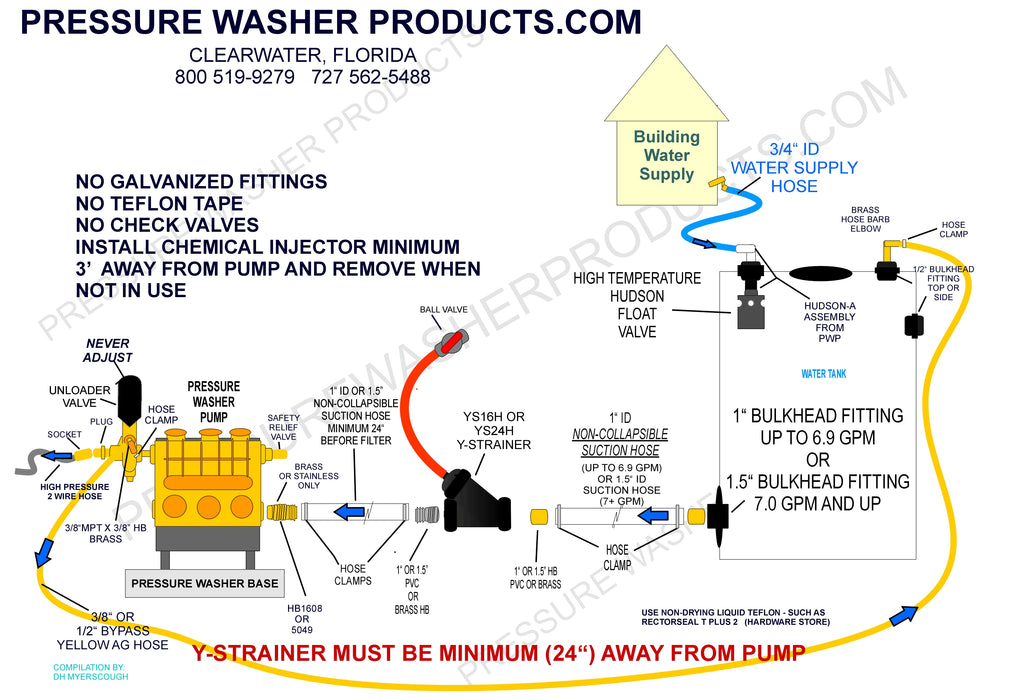
The inlet line size should be adequate to avoid starving the pump.
- Line size must be a minimum of one size larger than the pump inlet fitting. Avoid tees, 90-degree elbows, or valves in the inlet line of the pump to reduce the risk of flow restriction and cavitation.
- The line must be a flexible hose, not a rigid pipe, and reinforced on suction systems to avoid collapsing.
- The simpler the inlet plumbing the less the potential for problems. Keep the length to a minimum, the number of elbows and joints to a minimum (ideally no elbows) and the inlet accessories to a minimum.
- Use pipe sealant to ensure air-tight, positive sealing pipe joints
Have you ever wondered how to correctly plumb your pressure washer?
Pressure washer products love to share knowledge. Mount the pressure washer as low to the surface as possible about the supply port/bulkhead of the water tank but remember to use shock-absorbing rubber pucks (part# 4542) on your skid L-brackets of the pressure washer. Most pressure washers can be converted from carts with wheels to skid units by removing the wheels and installing L-brackets (1213) for your unit available through us.
Minimize the use of extra fittings. Do not use galvanized fittings or metal ball valves between your pump and water tank because they will likely corrode and flake little chunks into your pump valves leading to vibration and/or damage. Avoid extra elbows. Do not use PVC pipe anywhere. PVC pipe can become brittle and doesn't tolerate the weight of a surface cleaner, ladder, or your body weight for long. If not installed correctly, air will find its way into your pump leading to manifold damage. Install components using non-drying liquid Teflon and never use Teflon tape. Never adjust your unloader. The unloader should be set using a whip hose, high-pressure ball valve, high-pressure steel tee, snubber, and gauge to 200 psi above the operating pressure of the pump and left alone. Do not install check valves or any type of swivel fitting on the suction/supply hose assembly or air may become entrained causing extensive damage from cavitation.
Working with a non-collapsible hose can be challenging. We have several heat guns and ratcheting PVC hose cutters to tame the hose. When installing the hose into hose barbs, first slide the hose clamp a few feet away from the cut end. Grab some Slo-Mo soft wash surfactant for sodium hypochlorite, dish soap, or shampoo, and coat your finger or old toothbrush with a generous amount. Apply the soap to the inside several inches and the barbed end of the hose barb. Turn on the heat gun and hold the heat source about 3-4" away from the hose end while rotating the hose as you try to apply the heat as evenly as possible. Heat only until the hose turns shiny and releases a single plume of smoke. Turn off the heat gun and set it aside to cool. Install the barb into the hose end and push it down against the ground or vertical surface. Allow the end to cool naturally, move the hose clamp up about 1/16" or 1/8" from the end toward the thread, and tighten securely. Install the hose clamp to allow you to access it easily in the future so that you do not have to struggle to use a tool on the clamp.
Do not use Teflon tape on any fittings. Use medium, removable thread lock (5003, 10 ml, or 5004 50ml). Try not to use elbows or extra fittings. When at all possible, minimize the use of quick connects. Install the chemical injector at least 3' away from the unloader to prevent back-siphoning of chemicals into the internal components of the unloader. Always remove the chemical injector assembly when not in use.
Use a R2 or 2-wire jump hose on the high-pressure outlet of your unloader to your reel.
SKU: PL-8-TO